Part 1 of my blog series went over our parts list and initial setup for this project.
Part 2 dived into a little bit of code and making those LEDS light up for the first time.
This final part will go over installing Boblightd, XBMC boblight add-on, mounting the LEDS and configuring them to look their best.
If you followed Part 1 and Part 2, you should know how to SSH into the raspberry pi. Make note of your raspberry pi IP Address we'll be using it soon. Once logged in run the following commands to install boblight.
copied from here.
3. Install subversion
$ sudo apt-get install subversion
4. Clone boblight source
  $ cd ~
  $ svn checkout http://boblight.googlecode.com/svn/trunk/ boblight-read-only
5. Compile:
  $ cd boblight-read-only/
  $ ./configure --without-portaudio --without-x11 --without-libusb
If everything goes well.....
  $ make
  $ sudo make install
6. now configure your setup, see conf/LPD8806.conf for examples and move .conf file to /etc/boblight.conf
$ sudo cp conf/LPD8806.conf /etc/boblight.conf
7. you can test now by starting boblightd
$ sudo boblightd
we have to run boblightd using sudo for SPI to work
8. if you like, you can add boblightd to /etc/rc.local for it to start on boot
$ sudo nano /etc/rc.local
and add
/usr/local/bin/boblightd -fbefore exit
Once Boblight is installed open up XBMC and go to
- Settings
- Add-ons
- Get add-ons
- XBMC.org Add-ons
- Services
- XBMC Boblight
- Install
At this point you should be able to configure the boblight addon on XBMC. If you open the addon settings it should ask for an ip address. Type in your raspberry pi ip and hit ok. If you restart XBMC and everything went correctly...the LEDS will light up RED, GREEN, BLUE and either turn off or go to the ambient color configured in the settings.
We're almost there! We still need to configure boblightd for the amount and orientation of theLEDS. You can do this manually or you can use a program somebody wrote for this purpose.
This will spit out our boblight.conf file. You'll need to edit this before copying to the raspberry pi.
Boblight is normally used with an arduino connected by usb so thats the output/interface by default you should just need to change the output and the interface.
The interface needs to be changed to the raspberry pis ip address.
The beginning of my boblight.conf:
[global]interface 192.168.1.13port 19333[device]name ambilighttype momooutput /dev/spidev0.0channels 150interval 20000rate 115200debug off
This was kind of a pain to copy to the raspberry pi. Especially through command line.
Easiest way I found is to COPY the entire boblight.conf and create a new file
sudo nano boblightd.conf
and then PASTE the config into it.
and finally copy that file over your boblight.conf file
sudo cp boblightd.conf /etc/boblight.conf
Thats it! If everything went well boblight shoudl be configured. Every time you start up XBMC on your pc it should look for the the raspberry pi ip address and connect.
Mounting the LEDS
The picture above is my preliminary OMG I NEED THESE LEDS ON MY TV NOW. I just stuck them on there with some painters tape. Worked for a bit until the tv heated up and melted the sticky.
Once I got them stickied on there I created a test video for XBMC to play. I just went into mspaint and created a quick picture w/ a different color on each side and rendered that as an avi in Windows Movie Maker. Took about 15mins but it helped significantly when determining the leds were in the correct position.
In the picture below you can see my monitor in the background corresponding with the LED Colors around the tv.
Once we figured out how the LEDS were going to be laid out I cut up my TV Box for a large chunk of cardboard.
I've seen some much better implementations for an LED mount but i'm cheap and lazy.

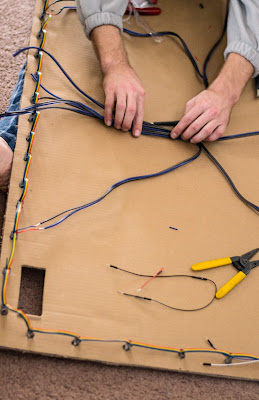
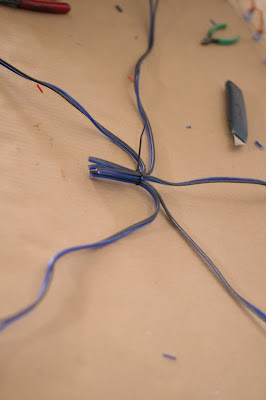
This picture and the one below show our power distribution for the LEDS something we probably didn't need to do with the amount of LEDS that we used (50). We noticed some drop off in brightness so we decided to do it anyways.

Notes: I'm still working on this project. Right now I have two Raspberry pis one to control the LEDS and one to run XBMC...unfortunately I haven't had the time to go through some of the forum posts regarding RaspBMC + Boblight addon. It seems somebody out there has gotten XBMC on the raspberry pi to talk with boblight using omxplayer. I'll do a follow up post once I figure it out and get it workin. For right now using my windows pc connected to the TV works out great.


